
Quick answer: Warm up, choose one mid-iron and hit three sets of eight shots to three different targets at roughly the same distance. Record carry and left-right finish for every normal effort. Ignore no shot unless an external interruption caused it. Draw the smallest practical oval that contains 20 of the 24 balls, note where its center sits relative to your aim, and use that pattern—not your best swing—to choose future targets.
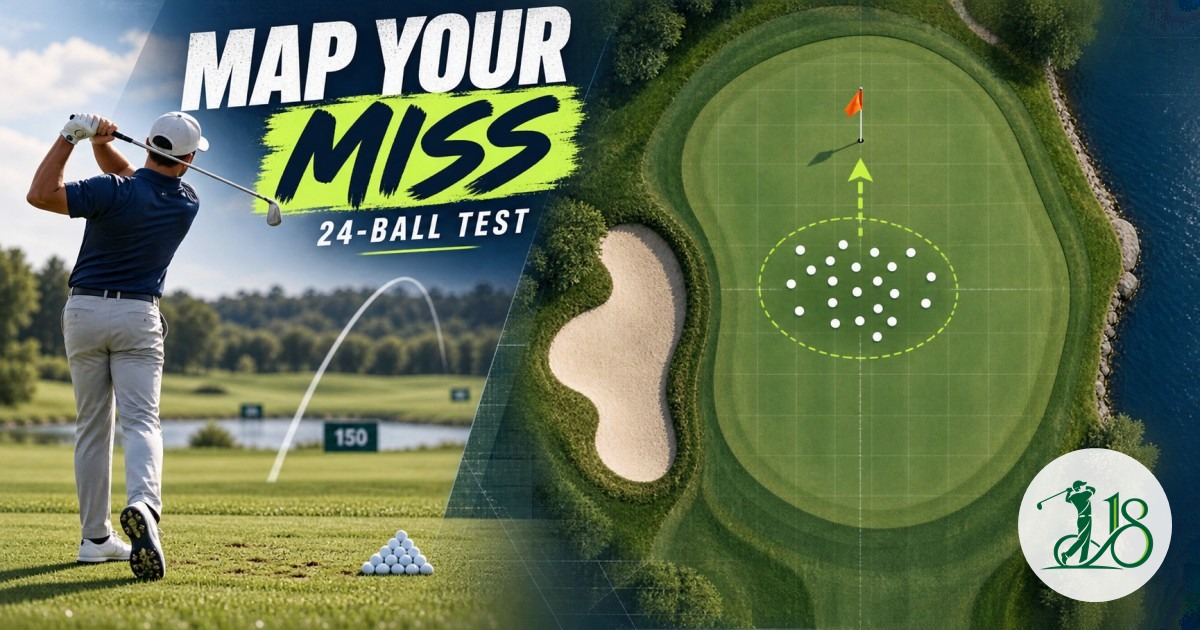
Many golfers know how far a flushed seven-iron travels. Far fewer know where 20 ordinary seven-irons are likely to finish. That gap explains why a confident range session can produce reckless decisions on the course: the golfer plans around one ideal number while the ball arrives inside a two-dimensional pattern.
The useful unit is not a perfect shot. It is your dispersion—the combination of short-long spread, left-right spread and directional bias across repeated attempts. The USGA's player-development material illustrates this idea by comparing target choices against an individual shot pattern and expected shots. Trackman's current practice tools likewise display carry, landing position and dispersion, then connect the results to strokes-gained feedback.
You do not need a launch monitor to begin. A measured range, a notes app and honest observation are enough to build a first map. Technology improves precision, but the central lesson survives without it: aim the whole pattern, not the center of the clubface fantasy.
Set up the test before hitting a counted ball
Choose one club you regularly use from 130 to 175 yards. A seven-iron is common, but the correct choice is the club that creates meaningful approach decisions for you. Use your normal ball when possible. Range balls can alter carry, so treat their numbers as a range baseline rather than a permanent yardage chart.
Warm up for 10 to 15 minutes. Hit wedges, then build to the test club. The warm-up ends when your body feels ready—not when you manufacture a streak of perfect shots. Next, identify three targets at similar distances but different horizontal positions. Changing the visual line prevents you from grooving one repeated alignment.
Create a simple table with four columns: shot number, carry or estimated finish distance, left/right finish, and strike note. The strike note should be brief: solid, thin, heavy, toe or heel. Do not turn the test into a swing diagnosis. Its purpose is to measure what happens when you make your normal on-course motion.
Hit three eight-ball blocks
Hit eight balls to Target A, then eight to Target B, then eight to Target C. Step away between shots. Change your club-selection thought, choose the line, take one rehearsal if that is your routine, and hit. This small reset matters because golf is a one-attempt game. Trackman's practice-transfer guidance contrasts repetitive same-target work with tests in which the learner must execute without several buildup swings.
Count the poor strikes. A heavy shot that finishes 18 yards short belongs to your current pattern because it can happen on the course. Exclude only a ball affected by something external—a range interruption, slipping mat or another person entering your space—and replace it at the end of that block.
Keep effort normal. This is not a speed test, and chasing a maximum carry number will distort the pattern. If fatigue changes your motion before ball 24, stop and repeat the test another day. Twenty-four representative swings are more useful than 40 tired ones.
Trackman's official explainer shows how situational practice, dispersion and strokes-gained feedback can be combined. Video: Trackman on YouTube.
Draw the pattern you actually own
Plot all 24 finishes on paper or in a spreadsheet. Mark the intended target at zero. Horizontal distance goes left or right; vertical distance goes short or long. If exact measurements are unavailable, use consistent zones such as far left, left, center, right and far right, paired with short, pin-high and long.
Now draw the smallest oval that contains roughly 20 shots. Leaving out four extreme results prevents one terrible swing from making the entire picture useless, but keep those four visible. They are risk warnings, not deleted evidence. Measure the oval's width and depth, then locate its center relative to the target.
Three patterns are common. A wide, shallow oval means direction is the dominant variable. A narrow, deep oval suggests carry control is the larger issue. An oval centered left or right reveals bias: your functional target must account for where the group tends to land, even if the ball flight looks straight to you.
Record median carry rather than relying only on average carry. One extremely thin shot can drag an average downward; the median better describes the middle of the set. Keep both if your tool provides them, but use the median as the first on-course reference.
Turn the oval into a target rule
On the course, imagine placing your oval over the green. Move its center until the largest useful portion avoids the most expensive trouble. When water guards the right side and your pattern is 28 yards wide, aiming at a right pin places too much of the oval over the hazard. Shift the target left, even if the flag is inviting.
The objective is not always the center of the green. It is the safest location for your particular distribution. A golfer whose pattern finishes eight yards left of aim may need a center-right target to center the landing group. A golfer whose normal miss is short should choose enough club that the pattern's middle reaches the safe section.
Use a simple traffic-light rule. Green means the full 20-ball oval fits between serious hazards; play your normal target. Yellow means the oval touches one severe edge; move the target away from it or choose more club. Red means the pattern covers penalty trouble on both sides or cannot reach a safe landing area; select a conservative club, lay up or use a different shot shape you have separately measured.
Practice transfer, not merely prettier contact
After mapping, spend 12 more balls testing decisions. Randomize the distance or target for every shot. Before swinging, state the carry, safest target and unacceptable miss. Score one point for a committed routine, one for a finish inside your expected oval and one for avoiding the designated trouble zone. A perfect session is 36 points.
This score separates process from outcome. A well-struck ball aimed at a reckless flag earns contact but not a smart-decision point. A slightly thin ball that finishes in the safe zone can still demonstrate a useful plan. Review the three components independently so you know whether the next session should emphasize strike, dispersion or target choice.
Trackman's Performance Center uses randomized situations, target references and strokes-gained benchmarks for a more detailed version of this idea. Its Map My Bag tool recommends multiple shots per club and stores carry, total distance and dispersion. Those systems add accuracy and comparison, but they do not replace the habit of choosing a target before every swing.
Repeat the test and look for a smaller useful pattern
Retest the same club after three or four practice sessions, or after a meaningful equipment or swing change. Use the same warm-up, ball type and target distances when possible. Improvement is not one unusually tight group. It is a repeatable reduction in width or depth, a better-centered pattern, or fewer severe outliers.
Set one measurable goal. For example: reduce the 20-ball oval from 32 yards wide to 26, move its center four yards closer to the aim line, or place 18 of 24 shots beyond the front-edge carry number. Avoid promising a score reduction from one drill; on-course scoring also depends on driving, short game, putting and the situations you face.
The most immediate benefit is clarity. Once you know the shape of your misses, a tucked flag stops being a dare. It becomes a geometry problem. Place the pattern where an ordinary shot remains playable, commit to that line and let the occasional perfect swing finish closer than planned.